
Anti-Tampering helps prevent your child from removing the Young Minds Kids app or turning off its protection. Once Anti-Tampering is enabled, you can also use additional iOS Settings to manage app access, purchases, content restrictions and other controls on your child’s iPhone or iPad. Learn more about iOS Settings.
Setup usually takes 7-15 minutes. You’ll need:
- Your child’s iPhone or iPad
- A Windows computer
- A USB cable to connect the device to your computer
Before you begin
Before you start, make sure the Young Minds Kids app is installed on your child’s device and paired with the correct child in the Young Minds Parent app.
We recommend completing the setup at home. If you’re away from a familiar location, Apple may apply a Security Delay, which can require you to wait for up to one hour before continuing.
Recommended: Back up your child’s device
We recommend making a backup before you begin. This is optional, but gives you an up-to-date copy of the device’s data if you need it.
You can use iCloud or your Windows PC to back up the device.
Step 1 - Download and run the Young Minds Anti-Tampering app
Download the Young Minds Anti-Tampering app for Windows.
The download isa ZIP file. Extract it, then open Young-Minds-Anti-Tempering-App.exe. The Windows app does not need to be installed.
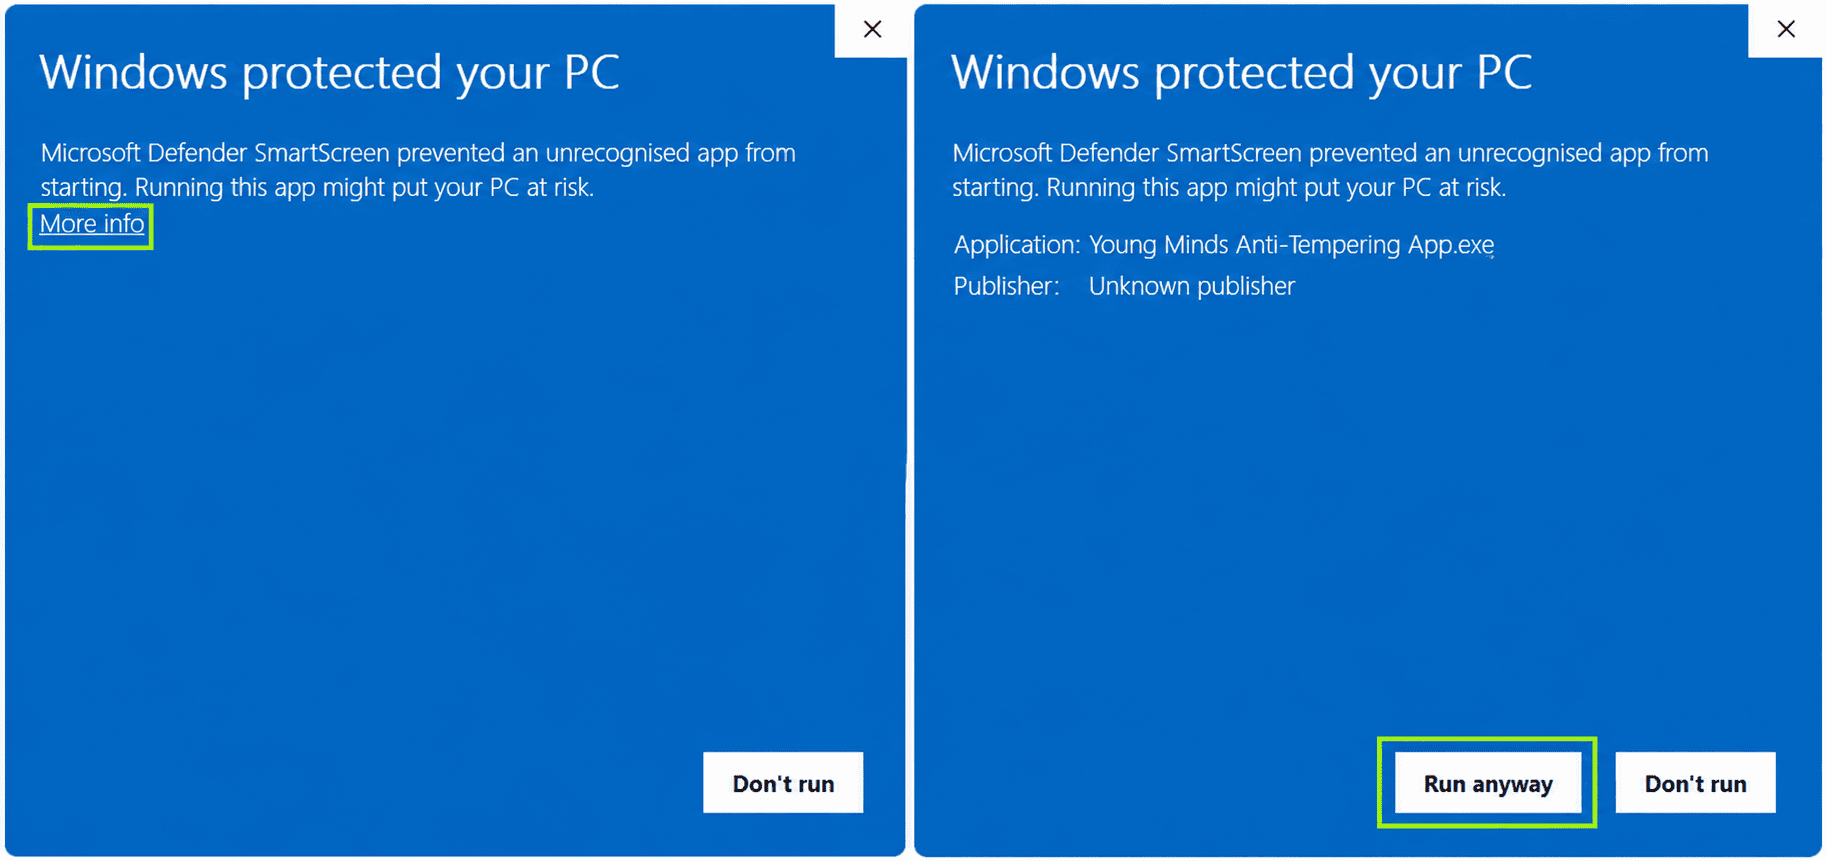
Some users may see a Windows Security message saying “Windows protected your PC.” If this appears, select More info, then Run anyway as shown below:
Step 2 - Install and open iTunes
Skip this step if you already have iTunes installed.
iTunes is required to connect your child’s iPhone or iPad to yourWindows computer.
- Download and install iTunes for Windows.
- Open iTunes at least once before continuing.
Step 3 - Log in
Log in to the Young Minds Anti-Tampering app using your Young Minds Parent account. Use the same email address and password you use for your Young Minds account.
The app will guide you through the rest of the process.
Note: Each step includes instructions and screenshots showing you exactly what to do. You can click the screenshots to enlarge them.
Step 4 - Check the setup information
The app will explain which settings need to be temporarily turned off before Anti-Tampering can be enabled.
For an iPhone:
- Encrypt local backup
- Stolen Device Protection
- Find My
For an iPad:
- Encrypt local backup
- Find My
Step 5 - Connect your child’s device
Connect your child’s iPhone or iPad to your Windows computer using a USB cable. Unlock the device and tap Trust if prompted. The Anti-Tampering app will automatically recognise the device and show the child name, device name, software version and Anti-Tampering status.
Check that this is the correct device, then select Enable anti-tampering on this device.
Step 6 - Turn off Encrypt local backup
If Encrypt local backup is enabled:
- Open iTunes (or Apple Devices) and select your child’s iPhone or iPad.
- Under Backups, untick Encrypt local backup. Enter the backup password if prompted.
Return to the Young Minds Anti-Tampering app, confirm that Encrypt local backup is turned off, then select Continue.
Step 7 - Turn off Find My
Find My must be temporarily turned off before Anti-Tampering can be enabled.
On iPhone
If Stolen Device Protection is enabled, turn it off first:
Settings→ Face ID & Passcode → Stolen Device Protection → Off
Then go to:
Settings → Apple Account name at the top → Find My →Find My iPhone → Off
Enter the Apple Account password if requested.
On iPad
iPad does not use Stolen Device Protection. Go directly to:
Settings → Apple Account name at the top → Find My →Find My iPad → Off
Enter the AppleAccount password if requested.
Once Find My is off, return to the Anti-Tampering app and continue.
Only if Apple requires a Security Delay
This can happen on an iPhone when Stolen Device Protection is enabled and Apple does not recognise the current location as familiar.
- Tap Start Security Delay on the iPhone.
- Wait one hour. You can continue using the iPhone, but do not restart it or turn it off.
- After the delay, confirm with Face ID or Touch ID and turn Stolen Device Protection off.
- Return to the Anti-Tampering app and continue with turning off Find My.
Tip: Completing this step at home or another familiar location can usually avoid the one-hour delay.
Step 8 - Enable Anti-Tampering
Once all required settings are off, you’ll see Ready to Enable Anti-Tampering and a checklist confirming that everything is ready.
Select Enable Anti-Tampering. The process usually takes 7-15 minutes.
Important: Keep your child’s device connected to the Windows computer. Do not unplug the USB cable.
Your child’s device will restart during setup.
Step 9 - Finish setup on your child’s device
After the device restarts, complete the remaining steps on the iPhone or iPad:
- Wait for the device to restart.
- Select your Wi-Fi network if prompted.
- When the Remote Management screen appears, tap Continue, then Enroll.
- Continue through the remaining setup screens until you reach the Home Screen, where you can see the normal app icons.
Keep the device connected to your Windows computer throughout this process. The I’ve Reached the Home Screen button will remain unavailable while setup is still in progress.
Once you can see the Home Screen, return to the Anti-Tampering app and select I’ve Reached the Home Screen. When asked to confirm, select Yes, I’m on the Home Screen.
Important: Do not confirm before the device reaches the Home Screen. Confirming too early may prevent Anti-Tampering from being enabled correctly.
Step 10 - Complete the setup
Once setup is complete, you’ll see Anti-Tampering Enabled.
Select Done in the Young Minds Anti-Tampering app.
Before you finish
Don’t forget to turn the security settings you temporarily disabled back on.
For iPhone:
Find My: Settings → Apple Account name at the top → Find My → Find My iPhone → On
Stolen Device Protection: Settings→ Face ID & Passcode → Stolen Device Protection → On
For iPad:
Find My: Settings → Apple Account name at the top → Find My → Find My iPad → On
Anti-Tampering is now active
Your child’s device will show Full protection active, and Anti-Tampering will show as Enabled in the Young Minds Parent App.
The Young Minds Kids app and its protection can no longer be removed or disabled by your child without your knowledge.
About Remote Management
During setup, you’ll see an Apple Remote Management screen showing YoungMindsApp Ltd. This is expected and is part of enabling Anti-Tampering. After setup, iOS or iPadOS Settings will also show that the device is managed by YoungMindsApp Ltd. This is a normal Apple system message and means Anti-Tampering device management is active.

