
This guide is for iPhone and iPad devices running iOS 27 or iPadOS 27. If your child’s device runs iOS 18 to iOS 26 or iPadOS 18 to iPadOS 26, click here for the correct guidance.
Use the Young Minds Advanced Protection app on your Windows computer to remove Advanced Protection from your child's iPhone or iPad.
Important: Removing Advanced Protection also removes the Young Minds Kids app from your child's device. Young Minds protection and monitoring will stop until you reinstall and pair the Young Minds Kids app again.
Removal usually takes 7-15 minutes. You'll need:
- Your child's iPhone or iPad running iOS 27 or iPadOS 27
- A Windows computer
- A USB cable to connect the device toyour computer
- Your child's device passcode and child's Apple Account password
Before you begin
We recommend completing the removal at home. If you're away from a familiar location, Apple may apply a Security Delay, which can require you to wait for up to one hour before continuing.
Have your child's device passcode and child's Apple Account password to hand. The device restarts during removal and asks for both.
Step 1 - Download and run the Young Minds Advanced Protection app
Download the Young Minds Advanced Protection app for Windows.
The download is a ZIP file. Extract it, then open the Young Minds Advanced Protection App.exe file. The Windows app does not need to be installed.
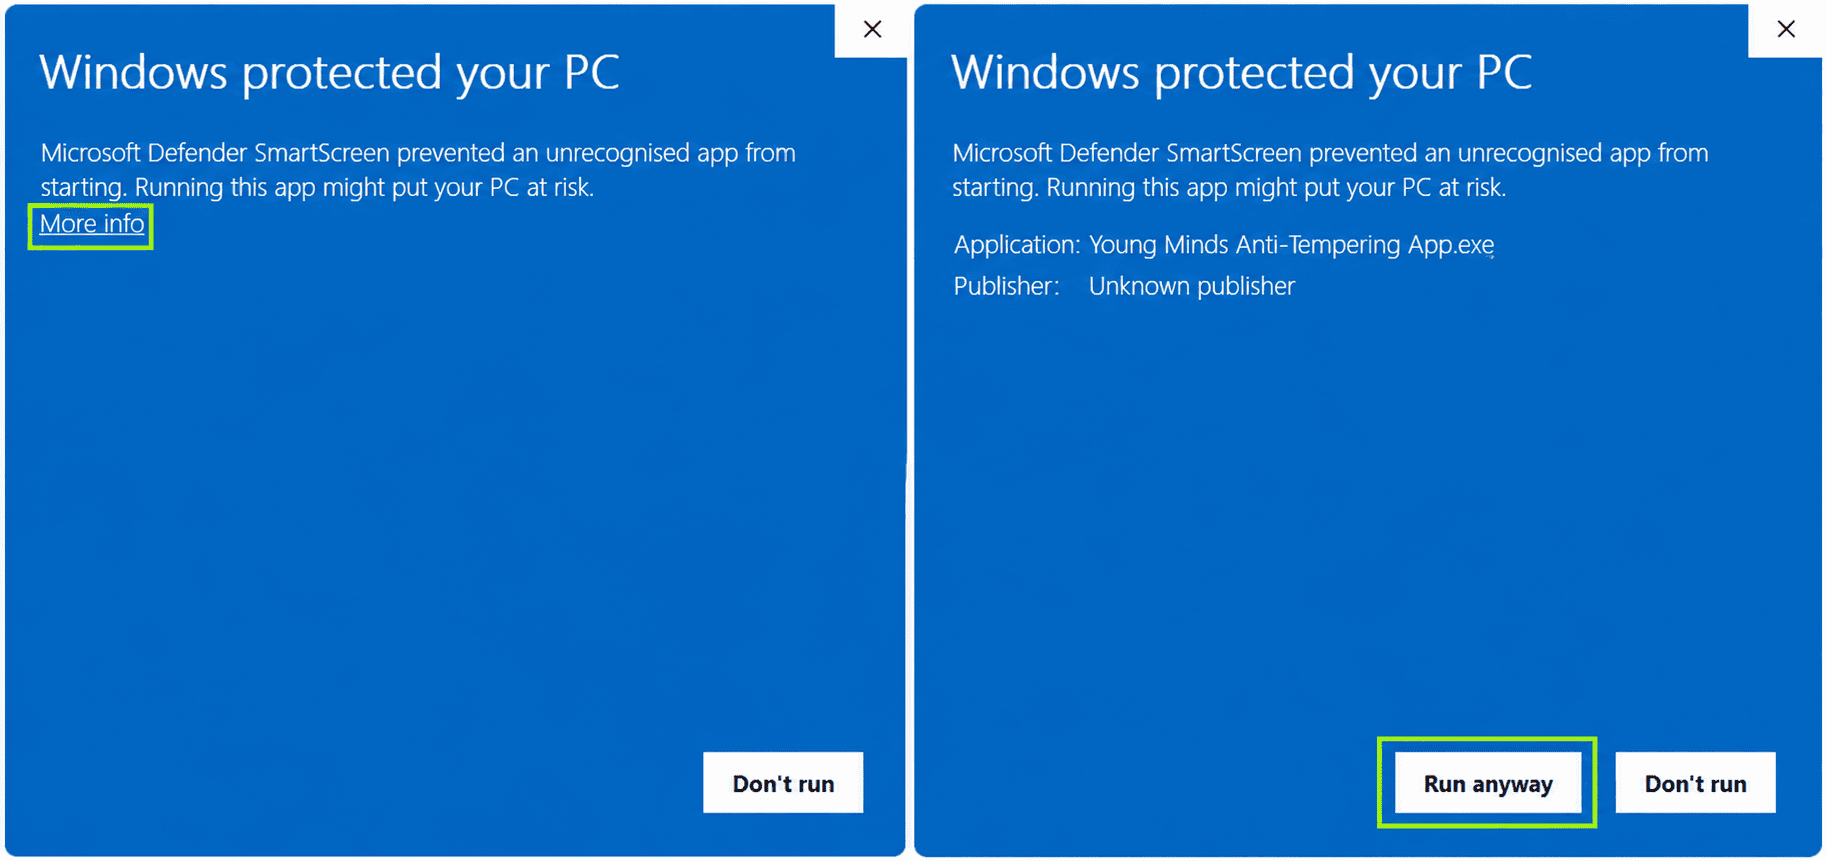
Some users may see a Windows Security message saying “Windows protected your PC.” If this appears, select More info, then Run anyway as shown below:
Step 2 - Install and open iTunes
Skip this step if you already have iTunes installed.
iTunes is required to connect your child’s iPhone or iPad to your Windows computer.
- Download and install iTunes for Windows.
- Open iTunes at least once before continuing.
Step 3 - Log in
Log in to the Young Minds Advanced Protection app using your Young Minds Parent account. Use the same email address and password you use for your Young Minds account.
The app will guide you through the rest of the process.
Note: Each step includes instructions showing you exactly what to do.
Step 4 - Connect yourchild's device
Connect your child's iPhone or iPad to your Windows computer using a USB cable. Unlock the device and tap Trust if prompted.
The Advanced Protection app will automatically recognise the device and show the child name, device name, software version and Advanced Protection status.
Check that this is the correct device. If Advanced Protection is enabled, select Disable Advanced Protection.
Step 5 - Turn off Find My
Find My must be temporarily turned off before Advanced Protection can be removed.
On iPhone
If Stolen Device Protection is enabled, turn it off first:
Settings → Face ID & Passcode → Stolen Device Protection → Off
Then go to:
Settings → Apple Account name at the top → Find My → Find My iPhone → Off
Enter the Apple Account password if requested.
On iPad
iPad does not use Stolen Device Protection. Go directly to:
Settings → Apple Account name at the top → Find My → Find My iPad → Off
Enter the Apple Account password if requested.
Once Find My is off, return to the Advanced Protection app and continue.
Only if Apple requires a Security Delay
This can happen on an iPhone when Stolen Device Protection is enabled and Apple does not recognisethe current location as familiar.
- Tap Start Security Delay on the iPhone.
- Wait one hour. You can continue using the iPhone, but do not restart it or turn it off.
- After the delay, confirm with Face ID or Touch ID and turn Stolen Device Protection off.
- Return to the Advanced Protection app and continue with turning off Find My.
Tip: Completing this step at home or another familiar location can usually avoid the one-hour delay.
Step 6 - Turn off Private Relay (only if your child uses iCloud+)
This step only applies if iCloud+ is enabled on your child’s iPhone or iPad. If your child does not use iCloud+, skip turning off Private Relay and continue in the app.
- If your child uses iCloud+, open Settings on their device and tap their Apple Account name at the top.
- Tap iCloud → Private Relay and turn Private Relay off.
If Private Relay is not available on your child’s device, you do not need to change anything.
In the Advanced Protection app, tick the box to confirm that Private Relay is off, or that your child does not use iCloud+.Then select Continue.
Step 7 - Unlock the device
Advanced Protection can not be removed from a locked device.
- Unlock your child's iPhone or iPad with its passcode and leave it on the HomeScreen.
- Have the device passcode and Apple Account password ready. You'll need both during removal.
- Keep the USB cable connected. Do not disconnect the device until the app tells you it has finished.
If the device locks itself while you are on this screen, unlock it again and select Re-check.
Step 8 - Remove Advanced Protection
Once all required settings are off, you'll see Ready to Disable Advanced Protection and a checklist confirming that everything is ready:
- Find My isturned off
- Private Relayis turned off (if your child uses iCloud+)
- The device is unlocked
Select Disable Advanced Protection.
Step 9 - Confirm removal
The app will explain what happens when Advanced Protection is removed: Advanced Protection will be disabled on your child's device, and the Young Minds Kids app will be removed.
If you want to continue, select Disable Advanced Protection.
Important: Keep your child's device connected to the Windows computer. Do not unplug the USB cable until the process is complete.
Your child's device will restart during removal.
Step 10 - Finish on your child's device
After the device restarts, complete the remaining steps on the iPhone or iPad:
- Swipe up to upgrade. Enter the device passcode and wait for the device to start.
- Unlock the device as usual. If you see Restore Completed, tap Continue.
- When prompted, enter the Apple Account password, then enter the device passcode.
- Keep the device connected and wait for the removal process to finish.
Step 11 - Complete the removal
Once removal is complete, you'll see Advanced Protection Disabled.
Select Done in the Young Minds Advanced Protection app.
Before you finish
Don't forget to turn the settings you temporarily disabled back on.
For iPhone:
Find My: Settings → Apple Account name at the top → Find My → Find My iPhone → On
Stolen Device Protection: Settings → Face ID & Passcode → Stolen Device Protection → On
Private Relay (only if previously turned off): Settings → Apple Account name at the top → iCloud → Private Relay → On
For iPad:
Find My: Settings → Apple Account name at the top → Find My → Find My iPad → On
Private Relay (only if previously turned off): Settings → Apple Account name at the top → iCloud → Private Relay → On
Note: Turn Find My back on before Stolen Device Protection. Turn Private Relay back on only if you turned it off during removal and want to use it again. Private Relay is available only with iCloud+.
What happens after Anti-Tampering is removed
Advanced Protection will no longer protect the device, and the Young Minds Kids app will have been deleted.
If you want to continue using Young Minds on this device, reinstall the Young Minds Kids app and follow the normal setup instructions. You can continue using the Young Minds Kids app without Advanced Protection, but your child will no longer have the additional protection that prevents the Kids app or its protection from being removed. Additionally, some iOS settings will not be available.
Check whether the Young Minds Kids app has been removed
In most cases the Young Minds Kids app is removed from your child's device automatically as part of the removal. Occasionally Apple leaves the app on the device. This is harmless - the app no longer protects or monitors anything once Advanced Protection has been removed - but you may want to tidy it up.
Check your child's Home Screen and App Library. If the Young Minds Kids app is still there, delete it in the usual way: touch and hold the app icon, tap Remove App, then Delete App.

